Mobile App Configuration
The Time To Pet Mobile Application allows your staff members to perform their services quickly and efficiently. The application is streamlined to provide your staff with the correct information at the correct time. As an administrator, you can configure time tracking and GPS tracking and optionally share this information with clients in their post-visit reports. For more information on how to view this information, see Viewing Time Tracking And GPS Data.
IN THIS ARTICLE
Check out a short video from our Onboarding Team on the Mobile App Configuration section!
Mobile App Configuration
To access settings for the mobile application, navigate to Settings > Mobile App > Configuration Tab.

Time Tracking
When enabled, Time Tracking will require your staff members to check in at the beginning of the visit and check out at the end. A timestamp will be recorded at both the beginning and the end, allowing you to verify the duration of the visit. This information can optionally be shared with the client.
GPS Tracking
When enabled, GPS Tracking will also record your staff member’s location at the beginning and end of a visit. From the Time To Pet website, these coordinates will then be displayed on a map for precise location tracking. This information can also optionally be shared with the client.
Note: GPS Tracking requires Time Tracking to be enabled.
GPS Route Tracking
Going one step further, GPS Route Tracking with track your staff member’s exact location for the entire duration of the visit. This allows your staff member’s entire route to be plotted on a map. This information will be shared with clients only if you elect to also show GPS Tracking information to the client.
Note: GPS Route Tracking requires GPS Tracking to be enabled. GPS Route Tracking is battery-intensive and can quickly drain your phone's battery if used for many hours throughout the day.
Enable Time & GPS Tracking
- Login to your dashboard.
- Using the sidebar navigation select “Settings”.
- Click on the link labeled "Configuration" in the Mobile App section.
- Change the Time Tracking Enabled option to Yes.
- If you wish to also share this information with your clients, make sure “Show Clients Time Tracking” is also set to Yes.
- If you wish to enable GPS Tracking, change “GPS Tracking Enabled” to Yes.
- If you also wish to share GPS data with clients, change “Show Clients GPS Tracking” to Yes.
- Click the Save Changes button.

Enable GPS Route Tracking
It often does not make sense to track the route of a visit for every service type. For example, on an Overnight service, you would want to leave this disabled but possibly enable it for Dog Walking. For this reason, GPS Route Tracking is configurable on a service-by-service basis. By default, it is disabled for all services.
- Visit your Services List and select the "Edit" button on the service you want to enable GPS Route Tracking for.
- Make sure that “GPS Tracking Enabled” is set to Yes.
- Find and edit a service that you want to enable GPS Route Tracking for.
- Change “GPS Route Tracking” to Enabled.
Click the Save Changes button for the service.

A Note About GPS Tracking And Privacy
Time To Pet provides the ability to optionally track your staff member’s location; however, it is important that you are aware of and follow any local, state, and/or federal laws around the information you collect and potentially share with others. Time To Pet is not liable if you are in violation of any laws in regard to the information collected.
Notify Clients About Event Start
Time To Pet supports the ability for you to send automated notifications to clients when their events are started. After enabling this feature, you can create the messaging that will be sent to your clients for that event-started notification.

If you have some services that you do not want to send event-started notifications for, you can disable this on a service-by-service basis. Just edit the service and look for this option:

Keep in mind that if you want to send Event Started notifications via text message, you need to enable texting for your company and for that client. You can learn more about enabling text messaging here.
After enabling this feature, clients will get a notification when the event has started and will be able to see a notification showing in-progress events via their Client App.
Showing Staff Profiles To Clients
When enabled, your clients will be able to view profiles for your staff members directly from the Time To Pet client app. Clients must first be sent a message by the staff member (either a general message or a visit report) for the option to view that staff member's profile. Clients cannot view a staff profile until a message has been sent from that staff member.
Note: Viewing a staff profile is only available from the client's conversation feed on the Time To Pet Client app.
Enabling Ability To Show Staff Profiles To Clients
To enable this feature, visit Settings > Mobile App > Configuration and toggle the "Show Staff Profiles To Client" to "Yes" and Save Changes:

Setting Staff Profile Details Shown To Clients
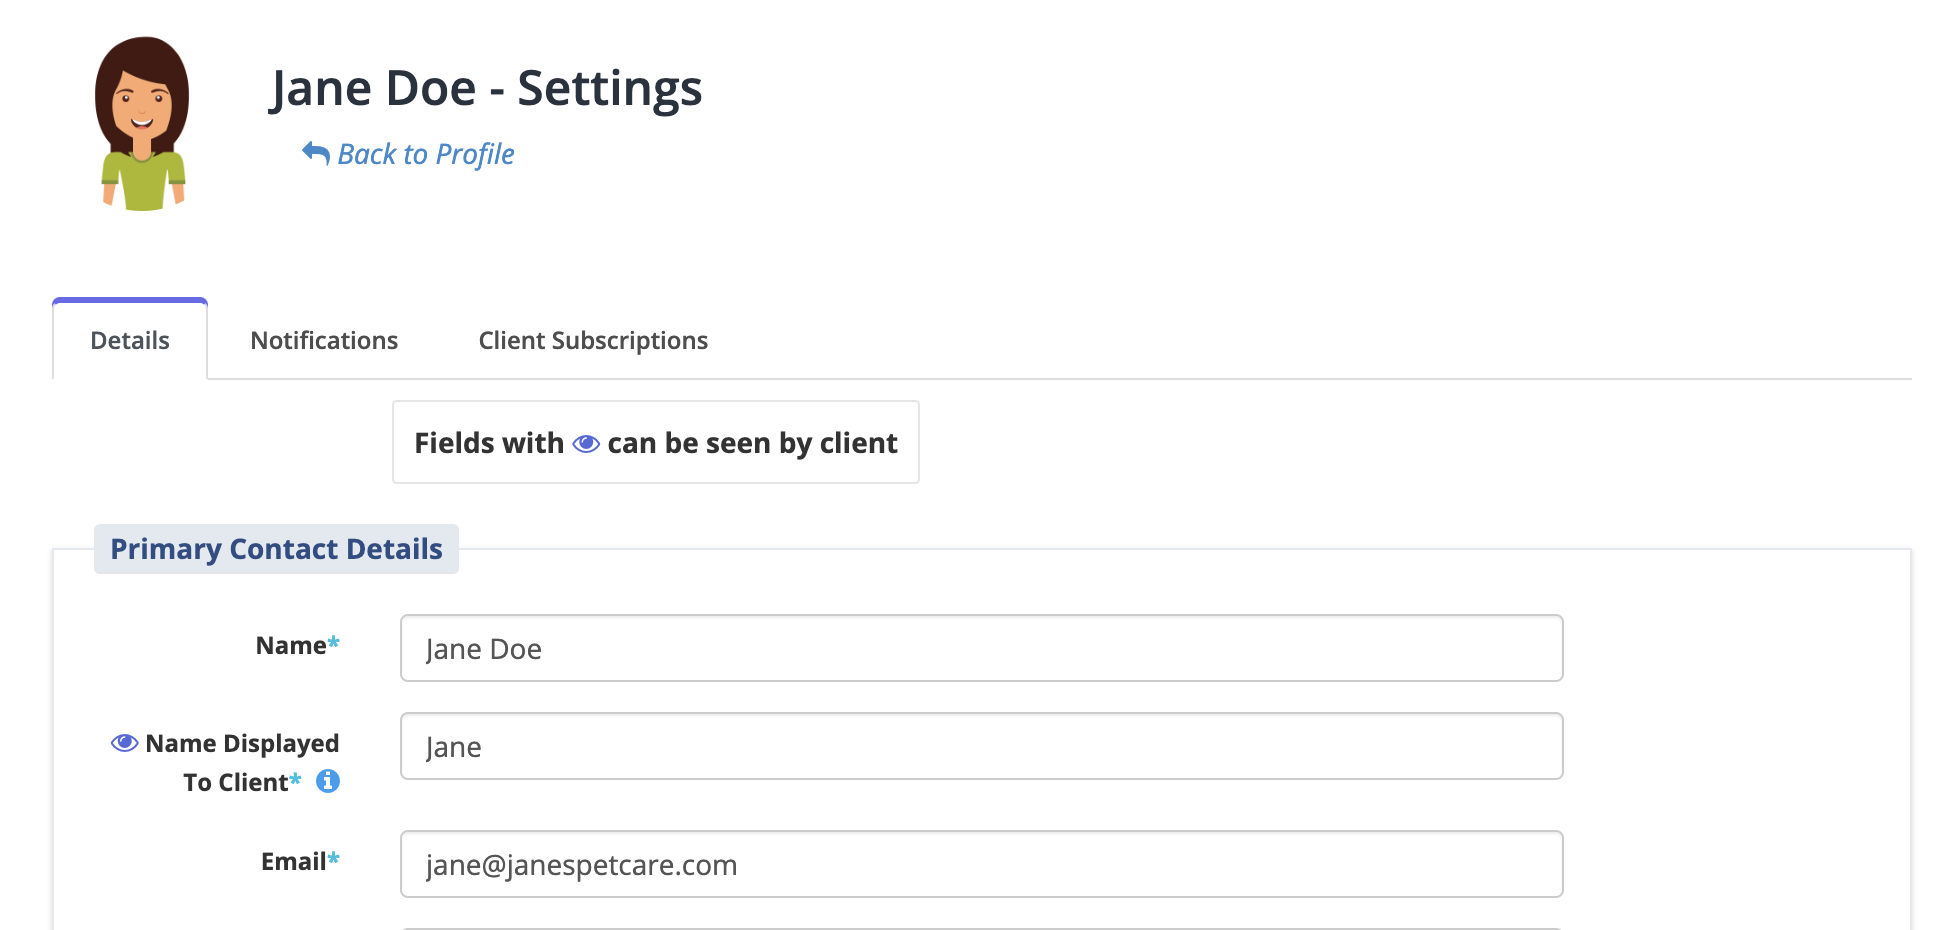
After enabling, you can edit each staff member's display name by navigating to the settings section for each staff member/user. The staff member's name will be displayed to the client based on the "Name Display To Client" field. If no data is entered here, the client will see what is entered in the Name field.
First, navigate to their profile > View Settings > Details tab. Then edit the "Name Displayed To Client" field:
You can create a staff public bio in the settings section for the staff member as well on the same page:

Be sure to click "Save Changes" when finished.
How Clients View Staff Bios
Note: Viewing a staff profile is only available from the client's conversation feed on the app. This feature is not available on the client portal.
Clients can tap on a staff member's profile picture from their conversation feed to view their staff bio:

