Scheduling Repeat Services Using Templates
Imagine you have a client that has the same services scheduled week after week after week. A walk at 12:30 PM every Monday, Tuesday, Wednesday, Thursday, and Friday. Scheduling this client manually every week would be tedious and time-consuming, especially if you have multiple clients on a similar ongoing schedule.
This is where Templates come in. With a Template, you can create a set of services once and then have those services automatically (or with the click of an "approve" button) added to the schedule for you. You will never again have to ask yourself if you remembered to schedule Fluffy's walks for next week!
IN THIS ARTICLE
Check out this video from our Onboarding Team on understanding Templates!
Creating A New Template
From the Scheduler, navigate to the Templates tab:

Click one of the “Add New Template” buttons:

Configure the Template's identification, scheduling, and billing details, then click "Save Template Details". To learn more about all of the different settings here, jump to the next section on Template Configuration Settings.

Template Configuration Settings
Name
A title for this Template for easy reference later.
Client
Who is this Template for?
Billing Frequency
This is where you can establish how frequently your Template will schedule and invoice events. Before selecting an option in the "Billing Frequency" field, it is helpful to ask yourself, "How often do I want to generate a new invoice for this Template?". Templates can repeat on the following frequencies:
- Weekly - Schedules and invoices a week at a time for events scheduled from Sunday to Saturday
- Multi-Week - A Multi-Week Template is also Sunday to Saturday, but it can span multiple weeks. For example, you could have a "Multi-Week" template that repeats the same pattern of events every 3 weeks.
- Semi-Monthly - A Semi-Monthly Template will schedule events twice per month; once for events between the 1st and 15th and once for events between the 16th and end of the month.
- Monthly - Monthly Templates will schedule events one month at a time from the 1st of the month through the last day of the month.
How Often
Available for Templates with a weekly or monthly billing frequency, this setting determines how often the Template should repeat. For example, you can create a Template with a weekly billing frequency that repeats every four weeks, which would result in one week of events being scheduled every four weeks. In other words, there would be one week of scheduled events, then three weeks with no scheduled events.
Weeks Per Period
Available for Templates with a multi-week billing frequency, this determines how many weeks should be included in each period.
First Occurrence
The first time period this Template will schedule events in. Templates cannot begin in the middle of a period and can only start in the next full period. For example, if it is February 16th, the first time a monthly Template can begin scheduling is for the March 1 – March 31 period. This means if this client is going to need services before the Template starts on March 1, you will need to manually add those events to the schedule outside of the Template.
Approval Method
Here you can choose if you want this Template to automatically "approve" and schedule events each period or if you want to manually "approve" it each period, triggering the events to be scheduled.
Approval Date
How many days before the first day of each Template period should the Template schedule (or "approve") the events? If you set the "Approval Method" to "Automatically Approve", this is the date it will happen. If you set the "Approval Method" to "Manually Approve", this is the date you'll be warned that the Template needs to be approved. This setting defaults to 3 days before and cannot be more than 180 days.
Pro Tip: For most Templates, an approval date of around 30 days is recommended. This will ensure that all events for the next 30 days have been added to the schedule for your staff to see, and should any permanent changes need to be made to the Template, only 30 days' worth of events will need to be manually updated.
Invoice Date
By default, all invoices generated by the Template will follow the date rules configured in Settings > Invoicing & Payments > Invoice Settings. You can override those settings here and customize the invoice date on a Template by Template basis.
Invoice Due Date
By default, all invoices generated by the Template will follow the date rules configured in Settings > Invoicing & Payments > Invoice Settings. You can override those settings here and customize the invoice due date on a Template by Template basis.
Projections
Projections are "previews" on your main Scheduler of what will be scheduled from the Template but have not yet been scheduled/approved. This helps you plan ahead in your scheduling by reminding you to keep space open for the projected events. This setting configures how many weeks (or months for monthly Templates) into the future to project the events on your schedule. This option can be completely disabled if you don't want the events projected.
Note: Clients can see their projected events from the Client Portal and Client App (and make change and cancellation requests against them), but they will only see invoices for events that the Template has already approved and scheduled. Staff cannot see projected events and can only see events that are officially approved, scheduled, and they are assigned.
Description
A brief description of the Template.
Adding Services To A Template
After configuring the Template's settings, it's time to set up services!
Click the “Add Service To Template” button:

A service form will appear where you can configure the details of this service, including the days of the week it should be scheduled, the time it should be scheduled, the type of service, the assigned staff member, which pets should be scheduled to each event, and any event notes. When you're finished setting the service's details, click "Save Changes".

After saving, you'll see the services populate the Template:

Editing Template Services
If you need to make changes to the services on a Template or add or delete services to an existing Template, open the Template and click "Edit This Template". From there, you can add new services using the "Add Service To Template" button:

To make changes to existing services, click on any individual event to edit the time, service type, add-on services, assigned staff, pets, extra pet fees, client time display, or notes for the service. You can also delete the service altogether.

If you need to make the exact change to multiple services on the Template, you can use the "Bulk Edit Items" tool:

Approving And Rejecting Template Periods
When configuring a Template, you will set an "Approval Date", which indicates how far in advance each Template period will be added to your schedule.
Templates that are set to approve automatically will be approved without any action required on your part, according to the approval date you set. You can override the automatic approval at any time by clicking the “Cancel Auto Approval” button, which will allow you to reject or approve that Template period:

Templates that are set to manual approval will not add events to your schedule until you manually approve them. You can approve them manually at any time; however, when approval is due (according to your configured approval date), Time To Pet will show a notification in the following places:

Note: It's impossible to undo or reverse Template period rejections, so please use caution when rejecting Template periods. If you later need to schedule events that would have been part of a rejected Template period, you will need to manually schedule them outside of the Template or create a new Template (and delete the current one).
Pausing A Template
While it's not possible to pause a Template, you can switch a Template from automatic approval to manual approval so that Template periods are no longer added to the schedule automatically. When the client is ready to resume service, you can reject any Template periods that have passed and then turn auto-approval back on.

Alternatively, if you have a specific period of time that a Template needs to be paused, you can delete upcoming projected events from the Template calendar, and those services will not be scheduled when the Template periods are eventually approved.

From the Template calendar, just click on each event you want to delete and click the "Delete Event" button.

If you need to add an event back to the template that was previously deleted, you can navigate to the Deleted Events tab of the Template calendar and click the "Undo Delete" button next to the events you want to return.

Keep in mind that you will not be able to delete events from the Template calendar that have already been approved. You will have to manually cancel or delete those events from the main scheduler by editing the event. If you have multiple events to delete or cancel, use our Bulk Edit tool to save time!
Deleting A Template
To delete a Template, open the Template and click "Edit This Template":

Then, click "Delete This Template":

Editing Template Settings
When a Template is first created, there are a number of settings you will initially configure. However, there may be a case where these settings need to be adjusted.
To access a Template's settings, navigate to the Scheduler > Templates tab and select the template you would like to update. Just above the Template's approval history, there will be a button for "Edit This Template".

After clicking this button, you will see the page where the Template's services can be added or edited. Towards the left side of the screen, there will be a menu of options. Click the "Settings" section of this menu.

The following page will show the available settings for the Template. Any settings that are not greyed out can be edited.

Please Note: Changes made to template invoice date and due date settings do not apply retroactively. The updated settings will take effect the next time the template is approved.
Note: Any setting that is greyed out cannot be changed. The only way to change greyed-out settings is to delete the Template and create a new one with the new billing settings.
FAQs
Q: Is there a way to edit Template services or settings in bulk?
There is no way to bulk edit Template services or settings in bulk.
Q: How can clients see their pending Template events in advance to request changes or cancellations?
Clients can see all events projected according to the "Projections" setting you've configured for the Template. For example, if you have projections set to "1 month", clients can request changes and cancellations against Template events up to 1 month in advance.
Q: How do rate increases/changes work for Templates?
Any Template events approved before the rate increase must be manually updated to the new rates. Rather than doing this individually, use the Bulk Update tool to Bulk Refresh Rates. Then, any Template events approved after the rate increase will automatically approve with the new rates. In other words, Templates approve at the rate set at the time they are approved.
Q: Is there a report just for Template clients or projected Template events?
You can generate a list of clients based on whether or not they have an active Template, as well as the billing frequency and approval methods set on the Templates. To do this, navigate to Reporting > Staff (or Users) & Clients > Clients tab, and add the filter "Client Template Filters". You can also use this filter to send Mass Emails to clients with or without a Template.
Unfortunately, we currently do not offer financial reporting on Template clients or projected Template events. To generate revenue reports of scheduled and approved events for your Template clients, you can add a custom Client Field and mark it as a "Customer Segment". You can then segment your financial reports in Reporting > Financial > Revenue by the values entered in that field.
Q: How do Templates affect the "Revenue Over Time" report? Does it include projections?
Only approved Template events will appear on revenue reports.
Q: Can clients set up their Templates?
Templates can only be set up on the Admin side of Time To Pet. Clients cannot set up their own Templates.
Q: How do I set up a recurring service discount for only my Templated services?
There are a few options for giving discounts to clients on Templates, such as setting custom client rates for your Template clients, using Frequency Discounts, or configuring the Template to charge a flat monthly rate. Here are our help articles on each:
- Adding Custom Rates For A Client
- Frequency Based Discounts
- Best Practices For Charging A Flat Monthly Rate For Recurring Weekly Services.
We have also seen some of our customers create a unique service with a discounted rate, hide that service from clients so they aren't able to request it from the client portal, and use the service on only Templates. This way, the events scheduled by the Template are discounted, but any "one-off" events that the client requests would use the regular service at full price.
Q: A Template is pending approval. How do I approve it so those events are on the Scheduler?
If you open Template and click the red button to "Cancel Auto Approval", you can then manually approve it. See Approving And Rejecting Template Periods above for more info.
Q: We are closed on holidays, and our company has blocked days. How do we stop Template events from approving on those holidays/blocked days?
There is no way to automatically block Template events from being scheduled on service block days. However, if the Template events are already approved on your Scheduler, you can cancel them in bulk (or delete them in bulk) using the Bulk Update tool.
Suppose you still have pending Template events for holidays or blocked days. In that case, you can delete them on the template's calendar or manually approve them, then cancel or delete them from the schedule.
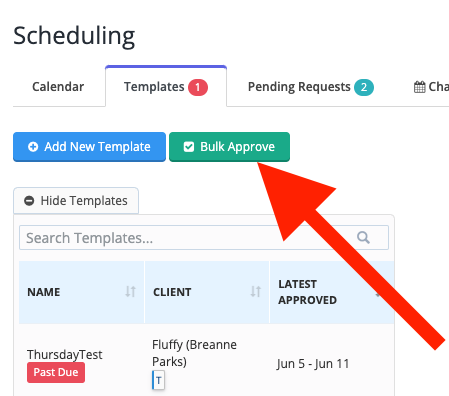
Another option would be to Bulk Approve your Templates through the holiday(s) and then use the Bulk Update tool to cancel or delete them from the schedule all at once.
Q: How can I change the billing frequency on a Template? The setting is greyed out.
Any setting that is greyed out cannot be changed. The only way to change greyed-out settings is to delete the Template and create a new one with the new billing settings.
Q: If a client requests to cancel or change a pending Template event, what happens?
When a client requests the cancellation of a pending/projected event and the request is approved, that event is removed from the upcoming Template approval, and it will not be added to the schedule when the approval date eventually rolls around.
Since pending/projected events have not actually been scheduled, it's not possible for cancellation fees to apply when they are cancelled. To apply cancellation fees to pending/projected events, you will need to manually approve the Template period that contains the event(s) you want to cancel and then cancel the events from the main scheduler. See Cancelling Events for those steps.
If the Template is approved before the cancellation or change request is processed, the request will automatically be declined.
Q: How do I cancel pending/projected Template events (I don't want to delete them)?
If you want to cancel (not delete) pending/projected Template events, you'll want to manually approve the Template period that contains the event(s) you want to cancel and then cancel the events from the main scheduler. See Cancelling Events for those steps.
Q: I approved a cancellation request that was for a pending/projected Template event that was within my cancellation window; why wasn't my automatic cancellation fee applied?
Since pending/projected events have not actually been scheduled, it's not possible for cancellation fees to apply when they are cancelled. To apply cancellation fees to pending/projected events, you will need to manually approve the Template period that contains the event(s) you want to cancel and then cancel the events from the main scheduler. See Cancelling Events for those steps.
We also highly recommend setting the "Approval Date" on each Template as far out, or further, than your cancellation policy takes effect so that all events falling within your cancellation policy are already approved and scheduled at any given time.
Q: I'm raising rates, and I keep seeing a notification that "extra pet rates are associated with linked Templates". What does that mean?
That notice lets you know that one or more of your Templates is using that service, and you are being asked if you want the extra pet fee to be updated on the Template(s). If you click "Cancel" on the notice, the extra pet fees on the Template(s) will not be updated. If you click "Update Linked Templates", the Template services using that service will be updated with the new extra pet fees.
Q: If I edit a service on the Template, does it update already approved and scheduled Template events?
Any edits made to Templates will not apply to events that have already been approved and scheduled - you would need to manually make those edits to any events that were already approved and added to the schedule. Your changes will only affect Template approvals in the future.