Cancelling Events
When a client no longer needs scheduled services, it is typically recommended that you cancel the event rather than delete it. This ensures the event history can be easily accessed, and any financial records tied to the event will not be affected. To change an event's status to "Canceled", follow these steps:
IN THIS ARTICLE
Canceling A Single Event
From the Scheduler, click on the event you want to cancel. From the pop-up that appears, click "Cancel Event".

Alternatively, you can click "Edit Event" in the pop-up that appears:

Just below the service order is the event details section. To cancel the event, change the "Status" option to "Cancelled", then click "Save Changes".

You will then be prompted to choose a cancellation fee to charge the client for this event. By default, the Automatic Cancellation Fee you have configured in your Invoice Settings will be applied (Read more about Automatic Cancellation Fees here). You can override that default by making a different selection in the "Action" menu.
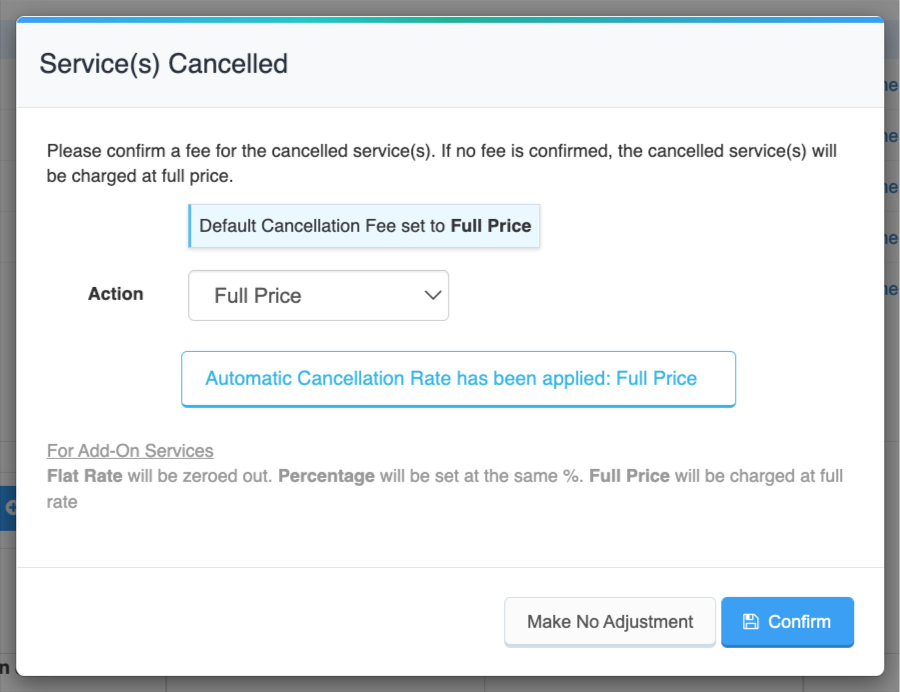
When you click "Confirm", the event status will be changed to "Canceled", and the cancellation fee you selected will be applied to the invoice.
Canceling Multiple Events With Bulk Edit
If you need to cancel multiple events on the same invoice/service order, you can use the Bulk Edit tool to cancel those events simultaneously.
First, open the service order that contains the events. You can do this by clicking on one of the events on the scheduler and clicking the three lines in the upper right-hand corner of the pop-up box:

Click the "Bulk Edit" button in the upper right-hand corner of the service order:

Select the events you want to cancel, then click "Edit "#" Events:

Select the "Status" option, change the status to "Canceled", and then Save Changes:

You will then be prompted to choose a cancellation fee to charge the client for the events. By default, the Automatic Cancellation Fee you have configured in your Invoice Settings will be applied (Read more about Automatic Cancellation Fees here). You can override that default by making a different selection in the "Action" menu.
When you click "Confirm", the event status on the selected events will be changed to "Canceled", and the cancellation fee you selected will be applied to the invoice.
Canceling Multiple Events With Bulk Update
If you need to cancel multiple events that span different invoices or clients, you can use the Bulk Update tool to cancel those events simultaneously.
From the Scheduler, click "Bulk Update":

Select the events on the calendar that need to be canceled, then click "Update # Events":

By default, the option to "Change Status" is presented. Change the New Status to "Canceled", then click "Change Status For # Events":

You will then be prompted to choose a cancellation fee to charge the client for the events. By default, the Automatic Cancellation Fee you have configured in your Invoice Settings will be applied (Read more about Automatic Cancellation Fees here). You can override that default by making a different selection in the "Action" menu.
When you click "Confirm", the event status on the selected events will be changed to "Canceled", and the cancellation fee you selected will be applied to the invoice.
How Cancelled Events Appear In Time To Pet
In Time To Pet, you can still see canceled events almost everywhere they appeared before being canceled. However, they will appear differently to indicate at a glance that they are canceled events. For example:
On the Service Order, the event will be "greyed out".

On the Invoice, a note will be added to the description that it's been canceled.

On the Scheduler, the event will turn grey.

Note: You can hide canceled events on the scheduler by ticking the "Hide Canceled?" box in the Scheduler filters.

Cancelling Events With A Frequency Discount
There may be times when a client that has recurring services with a Frequency Discount applied needs to cancel one or more of these services. It is important to pay close attention when processing cancellations for these services, as it can affect how a Frequency Discount is applied to the client’s other services.
For example, if an event with a Frequency Discount is cancelled at “No Charge”, then the charge for that service will be removed, and the remaining events in the Frequency period (day, week, or month, depending on how it’s configured) will be recalculated. If the client no longer meets the minimum event count to qualify for a discount for those services, then the discount will be removed entirely, and the charges for those services will revert to the original pricing.
Conversely, if an event with Frequency Discount is cancelled at “Full Price” (or at “Percentage Of Cost” or “Flat Rate” with any amount over $0), the cancelled event will retain the frequency discount rate or whatever amount over $0 you apply. Then, similar to what occurs in a cancellation with a “No Charge” situation, the remaining events in the Frequency period will be recalculated. If they no longer meet the minimum event count to qualify for the discount, the Frequency Discount will be removed.
When this happens, if a client has already fully paid their invoice containing those services, they will see a new outstanding balance appear as a result. If you would still like your client to receive their Frequency Discount despite the cancelled events, you will need to manually edit the amounts on their invoice or add a discount to the invoice in the amount of the new balance they owe so that they don’t owe anything additionally.